
Last updated November 17, 2026
 Bathroom remodeling
 Kitchen remodeling
 Home additions & ADU
 Roofing
 Windows & doors
 Driveway & pavers
 Fence
Free written scope consultation - allowances, timeline, and change-order rules on paper before a single trade is scheduled
Bathroom Remodeling Troubleshooting: Common Problems and How to Fix Them
Tile over a shower wall looks finished and watertight on day one whether the waterproofing membrane underneath is correct or completely absent. You won’t know the difference until the drywall on the other side of that wall starts to bubble, usually six to eighteen months after the last check cleared. In Lancaster, where summer attic temperatures push past 130°F and winter nights drop into the twenties, those failures show up faster than they do on the coast. This guide is about the problems you catch during construction, not the ones you discover after the tile is grouted. We’ll walk through waterproofing, grout, water pressure, ventilation, and what recourse you actually have when something goes wrong.
Quick Answer
Most bathroom remodel problems trace back to three things: waterproofing decisions hidden behind tile, rough-in sizing mistakes made before the walls closed up, and ventilation that was installed but never tested. The fix is almost always a conversation you have during construction rather than a repair you pay for later. Ask your contractor to show you the waterproofing system before tile goes on, verify water pressure at every fixture after rough-in, and test the exhaust fan with a tissue or a meter before the job closes out.
Styles & brands we work with
- Kitchen remodeling
- Bathroom remodeling
- Home additions & ADU
- Roofing
- Windows & doors
- Driveway & pavers
- Fence
Table of Contents
- Shower Waterproofing: What’s Actually Behind Your Tile
- Why Your Grout Is Cracking in the First Year
- Low Water Pressure After a Remodel: Where the Flow Went
- Exhaust Fans: How to Test Whether Yours Actually Works
- When There’s a Defect: Your Recourse in Lancaster
- Realistic Timelines and What Delays Them
- What These Fixes Cost in Lancaster
Shower Waterproofing: What’s Actually Behind Your Tile
There are three common shower assemblies in Lancaster homes, and only two of them are reliably waterproof when installed correctly. The third depends entirely on the installer, which is the problem.
Cement board is a substrate, not a waterproofing layer. It’s water-resistant, not water-proof. Cement board installed without a vapor barrier behind it and without a surface-applied membrane in front of it will pass moisture through to the framing over time. Some installers still treat it as sufficient on its own. It isn’t.
Foam backer board (the brand names you’ll hear are Schluter Kerdi-Board and Wedi) is a closed-cell foam panel that’s genuinely waterproof and bonds directly to the studs. It’s a complete system when installed with the manufacturer’s sealant and banding at every seam, corner, and penetration.
Bonded membrane systems are liquid-applied or sheet membranes that go over a substrate. These are excellent when applied at the right thickness and cure time. They fail when the installer skips the reinforcing fabric at corners or applies a second coat too early.
What inspectors in LA County actually verify depends on the jurisdiction. The City of Lancaster and LA County Building and Safety inspect for the pan liner and flood test on traditional mud-bed showers. Surface-applied membrane systems are typically inspected at rough-in and again at tile. If your contractor tells you waterproofing inspections “aren’t a thing here,” that’s a red flag. Every eligible job we take on in Lancaster has permits pulled and inspections signed, because the permit inspector works for you, not for us.
What to ask before the tile goes up
- Which waterproofing system are you using, and can you show me the manufacturer’s installation requirements?
- Was a flood test done on the shower pan, and is there a photo?
- Where does the waterproofing terminate at the curb and the door jamb?
- Is there a vapor barrier behind the cement board, and what’s its thickness?
Ask those four questions before the tile is set and you’ll catch most failures while they’re still cheap to fix.
Why Your Grout Is Cracking in the First Year
Grout cracks in a new bathroom for one of three reasons, and the crack pattern tells you which one you have. Diagnosing the cause matters because the fix depends entirely on it. Repointing the same failed joint twice is money thrown away.
Cause 1: Insufficient cure time on the mortar bed. If the tile was set over a fresh mortar bed or a fresh thinset bed and grouted too early, the substrate was still moving. Look for hairline cracks that appear along a continuous line, often at the perimeter of the floor or along the base of a wall. These pop up within the first 30 to 60 days.
Cause 2: Wrong grout for the joint width. Sanded grout is for joints wider than 1/8 inch. Unsanded grout is for joints 1/8 inch and under. When a contractor uses sanded grout in a 1/16-inch joint, it doesn’t compact properly and shrinks away from the tile edges. Look for cracks that run in short segments along a single grout line.
Cause 3: Substrate flex. This is the serious one. If the floor joists or subfloor have too much deflection for the tile, the grout cracks in a spiderweb or stair-step pattern near the center of the floor. It will keep cracking no matter how many times you repoint it. The fix is structural, not cosmetic.
How to diagnose which one you have
- Crack follows a straight line at a wall or curb → likely cure time or perimeter movement.
- Crack is short, jagged, and along a single grout line → likely wrong grout type.
- Cracks spread in a web across the middle of the floor → substrate deflection. Get it looked at.
If you have the third kind, call a pro before you do anything else. Grout dye won’t fix a moving floor. Barrett & Sons Construction Lancaster offers a free second opinion on any written estimate for exactly this reason.
Low Water Pressure After a Remodel: Where the Flow Went
Low water pressure after a remodel is almost always a rough-in decision, not a fixture problem. When a bathroom gets re-piped, the crew chooses pipe sizes and angle-stop placements. Those choices quietly set the ceiling on how much water you’ll get at the showerhead and the sink.
Common causes, in order of frequency:
- Undersized supply lines. Some installers run 1/2-inch PEX to the shower and 3/8-inch to the sink stops because it’s what was on the truck. Half-inch PEX to a shower valve with a 3/8-inch stop at the sink is fine. Half-inch PEX feeding both a shower and a sink on a long run with three elbows will starve the shower.
- Angle stop placed too far from the fixture. Every inch of extra run and every 90-degree elbow costs pressure. An angle stop three feet from the sink with two elbows loses more than you’d expect.
- Shared shower/vanity branch without a pressure-balancing valve. When someone flushes a toilet or turns on the sink while you’re showering, the shower valve needs a pressure-balancing cartridge to keep temperature and flow steady. If the rough-in skipped it, you’ll feel every draw on the system.
- Debris in the cartridge or aerator. Solder, thread sealant, or pipe dope left in the lines will clog the cartridge screens and reduce flow to almost nothing. This one is fixable in an hour.
If your remodel dropped to a trickle, the first thing to check is the aerator and then the cartridge screen. If those are clear, the problem is in the rough-in, and someone needs to open the wall or the access panel.
Exhaust Fans: How to Test Whether Yours Actually Works
A bathroom exhaust fan that runs and makes noise is not the same as a fan that’s moving air. We’ve seen fans in Lancaster homes rated for 110 CFM that were moving less than 40 because of a single flex duct run and two 90-degree elbows.
Here’s the plainest way to test yours: hold a single square of toilet paper up to the grille. If it pulls the tissue flat and holds it, the fan is moving some air. If it flutters, the fan is at a fraction of rated capacity. For a more honest test, an anemometer at the grille costs about $40 online. A fan that’s rated for 80 CFM should pull roughly 50 to 65 CFM at the grille after duct losses.
What inadequate ventilation looks like in year two
- Peeling paint on the ceiling above the shower.
- Mildew along the crown molding and ceiling corners.
- Condensation on the mirror that doesn’t clear in under five minutes after the shower.
- A musty smell that gets worse after a hot summer week.
- Efflorescence (white chalky staining) on the grout lines near the ceiling.
Lancaster’s dry summers hide poor ventilation for months. Then winter hits, the windows stay shut, and the moisture has nowhere to go. If your bathroom was remodeled last spring and you’re seeing any of the signs above, the fan is a strong suspect. Replacing the fan is usually a half-day job. Repairing the ceiling it damaged is not.
When There’s a Defect: Your Recourse in Lancaster
If a bathroom remodel in Lancaster has a genuine defect and the contractor won’t make it right, you have three concrete paths. Knowing them before you sign is the whole point.
1. The California contractor license bond. Every licensed contractor in California must carry a $25,000 contractor’s license bond (the limit has been rising under recent CSLB changes). You can file a claim against that bond through the surety for work that’s defective or abandoned. The bond isn’t insurance for you; it’s a guarantee of performance, and it caps at the bond amount. Claims go to the surety the contractor used, which you can find by looking up the license on the CSLB website.
2. The CSLB complaint pathway. The Contractors State License Board takes complaints for licensed contractors. You file online, upload contracts and photos, and CSLB assigns an intake mediator. For a case that can’t be resolved, CSLB can issue a citation, order corrections, or refer for arbitration. The advantage is speed; the disadvantage is that CSLB has no power to award damages beyond ordering the contractor to fix or refund.
3. Your written warranty, if it’s enforceable. A written warranty has to include: the specific scope it covers, the duration, the procedure to file a claim (in writing, to a specific address), a defined response window, and whether it transfers to a new owner. “Lifetime warranty” with no claim procedure is decorative. Ours is the 90-Day Done Right Promise, written on every contract: if it’s not done right, one call brings us back to make it right. Look for the 90-day window in writing, not just a handshake.
Before anything else, put your complaint in writing to the contractor, sent by certified mail, with photos and a specific remedy request. Most disputes end there. For anything larger than the contractor’s ability to fix, the CSLB pathway is your best next step.
Realistic Timelines and What Delays Them
A full bathroom remodel in Lancaster runs four to seven weeks of actual construction, plus a week or two of permit and material lead time. Anything quoted at “three weeks, guaranteed” is either a partial job or a schedule that will slip.
The five most common delays on bathroom jobs here:
- Tile backorder. Specialty tile from premium lines can run four to six weeks. If you’ve picked a tile that’s not in stock locally, order it before the demolition date.
- Inspection scheduling. Rough-in, waterproofing, and final inspections each take a few business days to schedule in Lancaster and the surrounding areas. Skip the pre-schedule and you add a week per inspection.
- Hidden plumbing or framing damage. If the rough-in reveals a rusted drain line or a rotted stud, that changes scope. Written change orders handle this cleanly, but it does add days.
- Cabinet and vanity lead time. Semi-custom vanities run three to five weeks from order to delivery.
- The “we’ll come back and finish the punch list” problem. Small items at the end drag out because the crew is on the next job. A written punch list dated at the walk-through is how you prevent this.
If the remodel is part of a larger project, like adding a bathroom with an ADU or connecting a new bathroom to an addition, see our Home Additions & ADU in Lancaster page for how those timelines stack.
What These Fixes Cost in Lancaster
Repairs to a bathroom remodel are usually far cheaper than the original job, which is why catching problems during construction pays for itself many times over. Here’s what these fixes run in the Lancaster market as of this writing.
- Full shower re-waterproofing (behind existing tile): $2,400 to $4,800, including tile removal and re-tile on the wet wall.
- Spot re-grout with color-matched epoxy: $250 to $600 for a shower or vanity surround.
- Grout replacement over a full shower: $600 to $1,200.
- Replacing a bathroom exhaust fan with a properly ducted unit: $350 to $750.
- Re-piping a shower supply to fix flow: $600 to $1,400 depending on access.
- Pressure-balancing valve installation: $400 to $900, cartridge and labor included.
- Substrate deflection repair (sistering joists under tile): $1,800 to $4,500 depending on joist count and access.
Prices vary with access, fixture grade, and whether permits are required for the correction. For a true line-item quote, call us for a free estimate. Our estimates are written, line-item, and free of change orders after signature unless the scope changes in writing.
Common Mistakes to Avoid
- Skipping the flood test. A shower pan that isn’t flood tested for 24 hours can leak for months before the ceiling below shows it. Ask for a photo of the pan full of water with a date stamp.
- Grouting before the bed is cured. Fast scheduling pressure pushes crews to grout the day after tile set. That’s when cracks start. Give the mortar bed the full cure.
- Treating cement board as waterproof. It’s not. If your contractor’s waterproofing plan starts and ends with cement board, ask about the vapor barrier and the surface membrane.
- Running the fan on a timer only. A timer that turns the fan off in ten minutes leaves moisture in the room. The fan needs to run 20 to 30 minutes after a shower, minimum. Set the timer accordingly.
- Accepting a verbal promise on a fix. Every scope, every allowance, every price change arrives as a written change order before work happens. The allowance that isn’t on paper is a surprise waiting for a date.
- Not verifying the license before signing. Look up the license number on the CSLB website before you write a check. The license, the name, and the address should all match. Ours are published for exactly that reason.
- Remodeling before inspecting the perimeter. If the bathroom sits under a roof that’s losing granules or over a slab with no vapor barrier, those problems infect the new bathroom. Look at the roof and the fence line before you start. Our Fence Installation in Lancaster page covers how perimeter issues can show up as water intrusion inside the house.
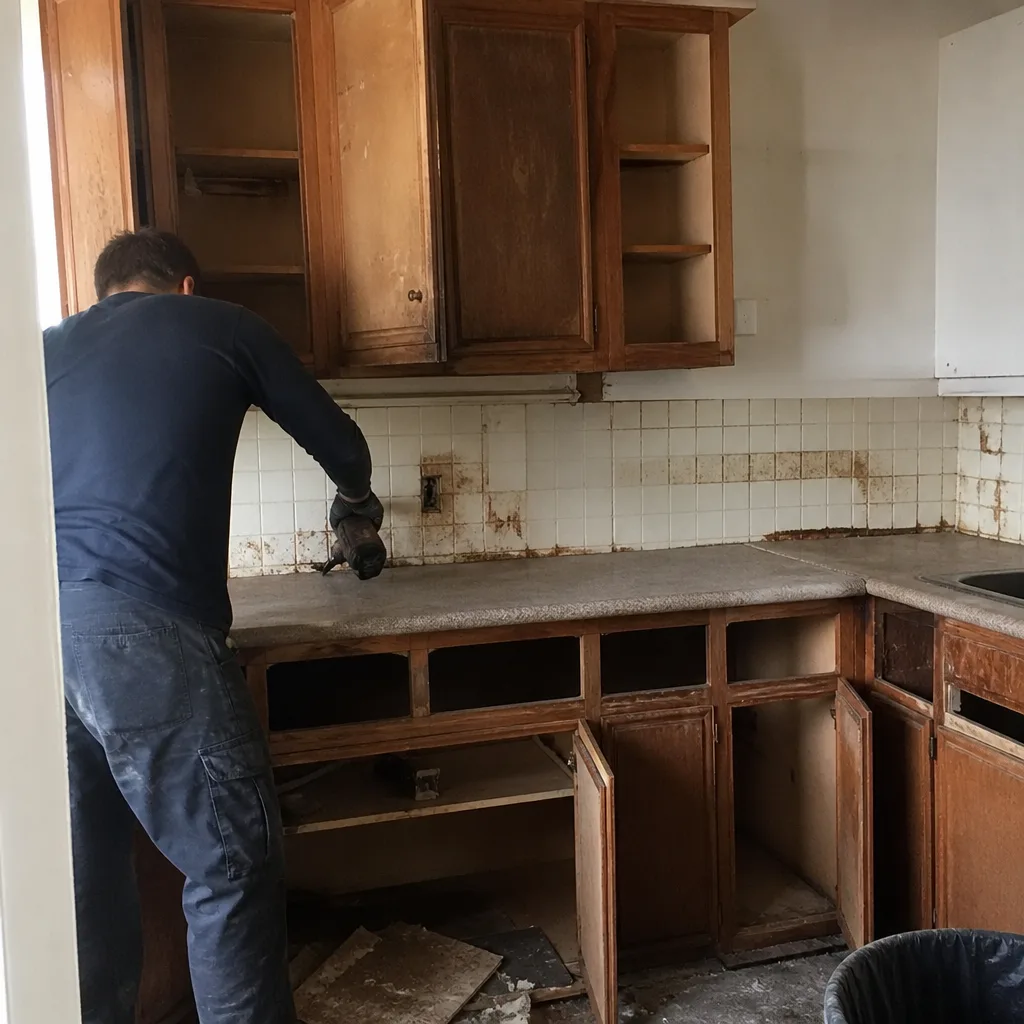
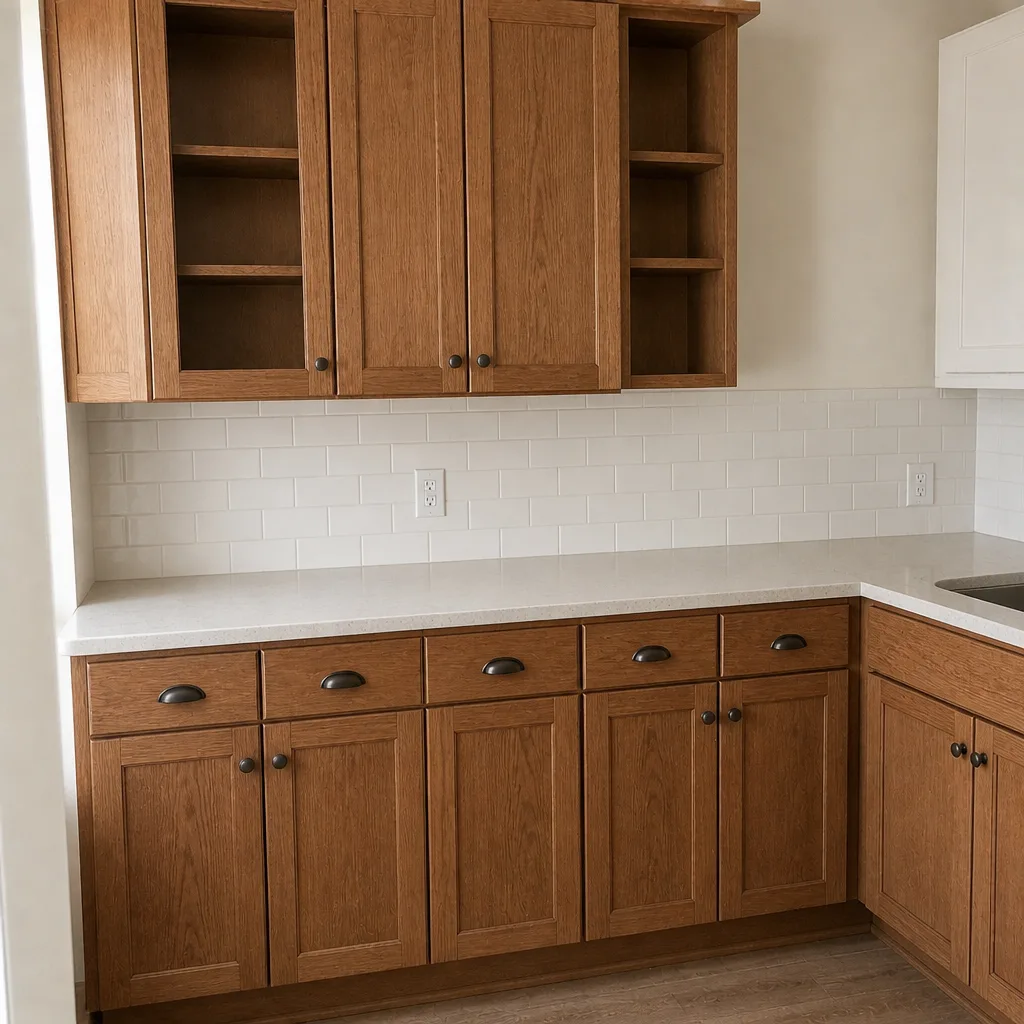
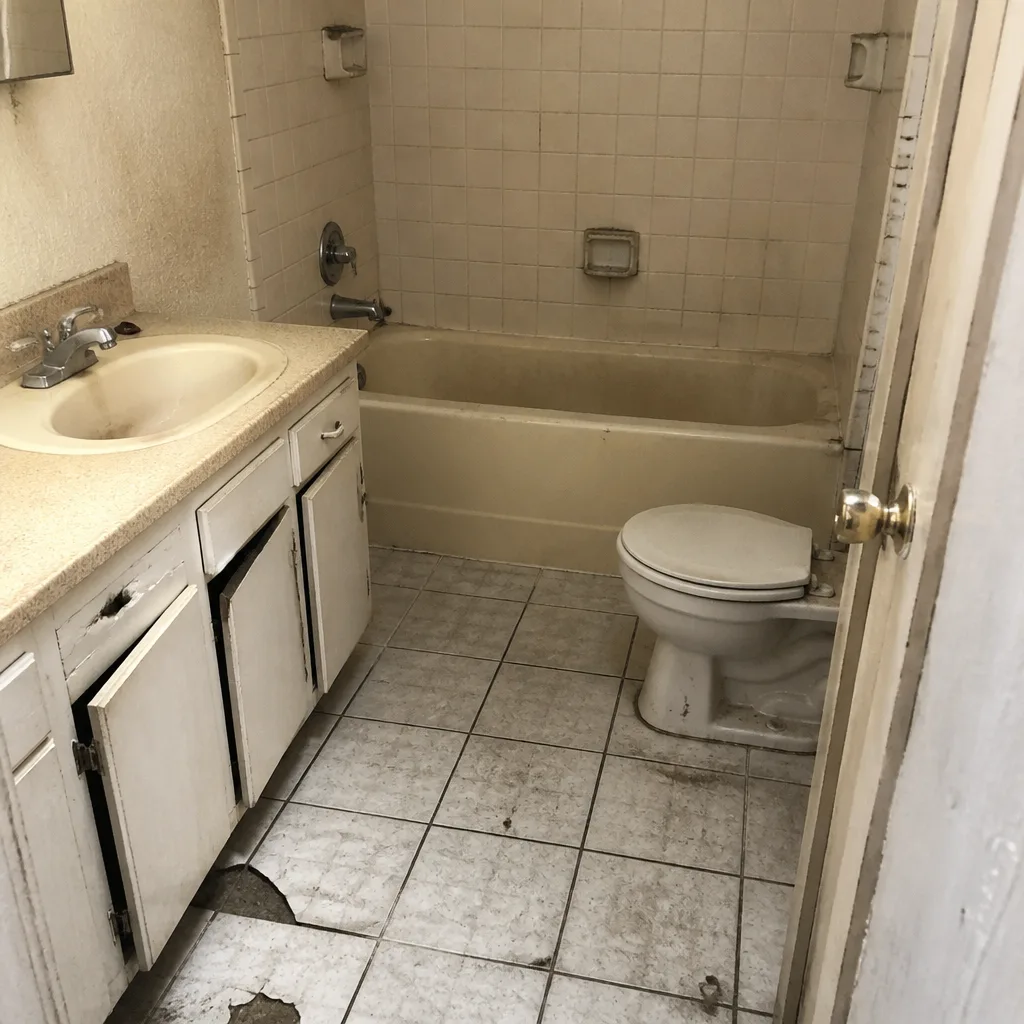
See the difference
 Before
 After
 Before
 After
 Before
 After
When to Call a Professional
Some of these problems you can diagnose yourself with a tissue and an anemometer. Others have to go to a pro. Call a professional if any of the following is true: your shower pan has never been flood tested and the tile is already up; your grout is cracking in a spiderweb pattern across the floor; your water pressure dropped by more than 30% after the remodel and clearing the aerator didn’t fix it; or your bathroom ceiling has started to peel or grow mildew in a house that’s less than two years old. If you’re inside the warranty window and the contractor isn’t responding, that’s a different problem and it needs a paper trail.
Barrett & Sons Construction Lancaster offers free estimates in Lancaster and the surrounding communities. Call (888) 427-1810 and a live person answers, day or night.
Frequently Asked Questions
Ask to see the waterproofing system before the tile goes on, and look for a flood test photo. A correctly waterproofed shower uses either a foam backer board system with manufacturer sealant at every seam, or a bonded membrane over cement board with fabric reinforcement at the corners. Cement board alone is not waterproofing, and “the installer said it’ll be fine” is not a system.
The cause is almost always one of three things: the mortar bed wasn’t fully cured before grouting, the grout type didn’t match the joint width, or the substrate flexes enough to crack the grout from below. Hairline cracks along a straight line are usually cure or grout type. Spiderweb cracks across the middle of the floor are substrate flex, and that one needs professional attention. Call (888) 427-1810 for a free second opinion on what your cracks are telling you.
Low flow after a remodel is almost always a rough-in sizing or angle-stop placement problem, not a fixture defect. The two cheapest checks are the aerator and the cartridge screen. If those are clear and pressure is still low, the supply line size or the number of elbows in the run needs to be reviewed. This can usually be corrected without a full re-pipe.
Hold a square of toilet paper up to the grille while the fan runs. If it sticks flat, the fan is moving air. If it flutters or falls, the fan is at a fraction of its rated CFM. A more accurate test uses an anemometer at the grille; expect 50 to 65 CFM at the grille for an 80 CFM fan after duct losses. Low readings usually mean an undersized duct or too many elbows.
Yes, most bathroom remodels do. Moving plumbing fixtures, relocating the shower, changing the exhaust fan vent location, and adding a new electrical circuit all trigger permits. A cosmetic refresh (paint, replacing a vanity without moving supply lines, retiling over an existing waterproofed surface) may not. Every eligible job we take on has permits pulled and inspections signed, because the permit inspector works for you, not for us.
In the Lancaster market, a full bathroom remodel runs $18,000 to $42,000 depending on fixture grade and whether the plumbing or electrical layout moves. A cosmetic refresh with tile, vanity, and fixtures runs $9,000 to $16,000. The number that matters is a written, line-item estimate with your allowances spelled out. Call (888) 427-1810 for a free estimate.
The Bottom Line
Bathroom remodel problems don’t start on completion day. They start at waterproofing, at rough-in sizing, and at the ventilation decision. If you catch those three at construction, the rest of the job usually holds up. If you catch them after, you’re paying a second contractor to redo work the first one should have done right. Ask for the flood test photo. Ask which waterproofing system is being used. Ask for the exhaust fan reading before the final walk-through. And if the contractor won’t answer those questions in writing, that’s your answer. Every eligible job we take on in Lancaster comes with permits pulled, inspections signed, written change orders on every scope change, and the 90-Day Done Right Promise on every contract. For everything else around the house, start at our Barrett & Sons Construction Lancaster home page, and see how we handle the outside work at Driveway & Pavers in Lancaster.
To schedule a free estimate, call (888) 427-1810.
Written by the team at Barrett & Sons Construction Lancaster.