
Last updated November 17, 2026
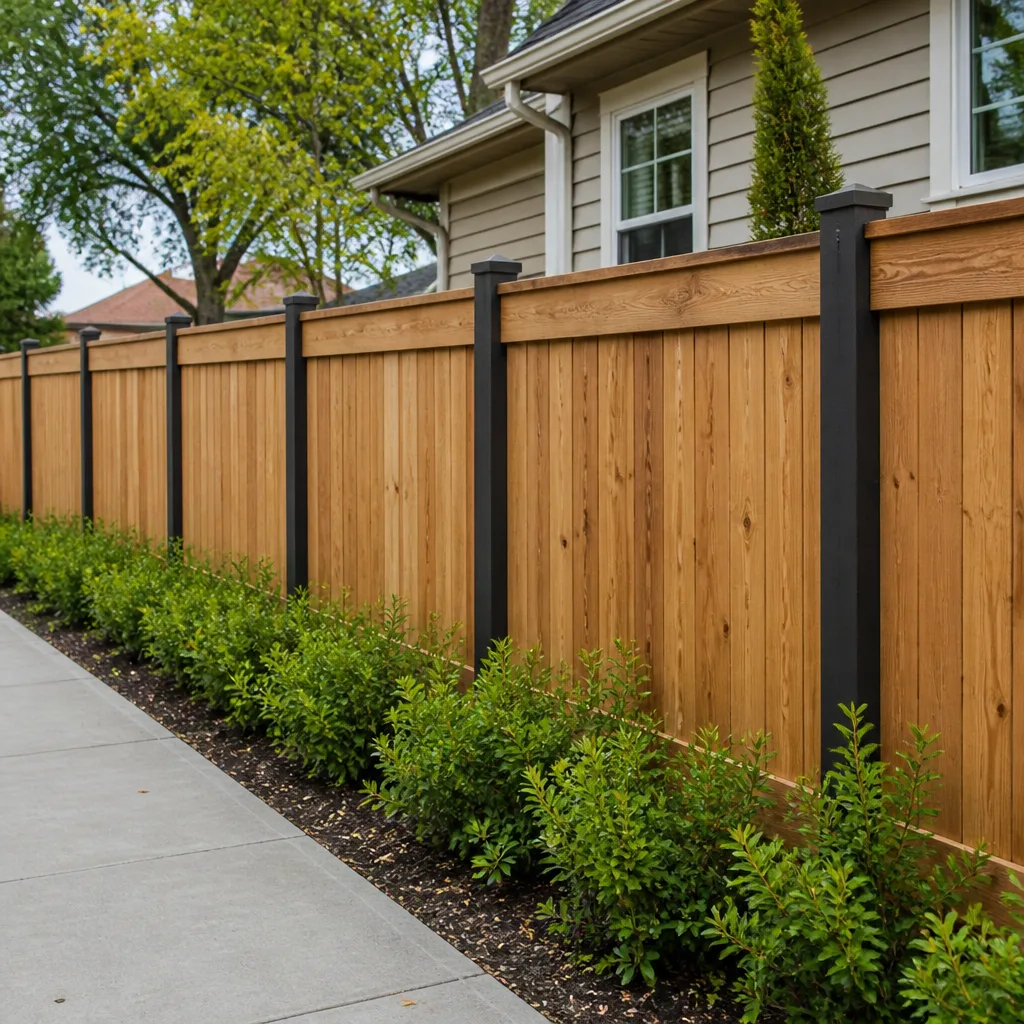 Fence
 Kitchen remodeling
 Bathroom remodeling
 Home additions & ADU
 Roofing
 Windows & doors
 Driveway & pavers
Free written scope consultation - allowances, timeline, and change-order rules on paper before a single trade is scheduled
Fence Installation Troubleshooting: Common Problems and How to Fix Them
A leaning fence post that rocks when you push it and a post that leans because the whole panel racked in a windstorm need completely different repairs. Treat them the same and you’ll spend money twice. In Lancaster, most fence failures come down to three things: posts set too shallow, the wrong concrete mix, or hardware that was never rated for high-desert conditions. Each one looks similar from the driveway and costs different money to fix. This guide shows you how to tell which problem you actually have before you dig, pour, or call anyone.
Quick Answer
A fence post leaning in Lancaster is usually a footing problem – the concrete collar cracked, the post lifted, or the hole was too shallow for our caliche soil – and it’s fixed by resetting the post in proper concrete, not by propping the panel back up. A fence that leans as a unit, with posts still firm, is a panel or rail failure. Diagnose the footing before you spend a dollar, and always let concrete cure a full 24 to 48 hours before you load the post again.
Styles & brands we work with
- Kitchen remodeling
- Bathroom remodeling
- Home additions & ADU
- Roofing
- Windows & doors
- Driveway & pavers
- Fence
Table of Contents
- How to diagnose a post failure vs. a panel failure without digging
- Why galvanized hardware fails in Lancaster soil
- Wood fence warping in the Antelope Valley
- How to reset a leaning post the right way
- Gate sag diagnosis: hinge, post, or frame
- Concrete, depth, and cure time
- What to check each season
How to Diagnose a Post Failure vs. a Panel Failure Without Digging
Walk out with a level and a firm hand. Push the post near the ground and watch two things: does the post itself move, and does the panel move with it? If the post rocks in the soil, you have a footing failure. If the post stays put and the rails or pickets tilt, the post is fine and the panel has racked.
Here’s the short version that covers most cases:
- Push test. Firm pressure at knee height. Movement at the base means footing. Movement only at the top means the post is loose in the bracket or the panel is flexing.
- Level check. Hold a level against the post face, plumb and square. A post out of plumb by more than an inch over six feet is a footing issue.
- Rail check. Look where the rails meet the post. Rust streaks, split wood, or a gap widening at one corner points to a fastener failure.
- Ground check. Look for a ring of cracked dirt around the post. That halo is the concrete collar breaking away from the soil – the post is moving inside its hole.
In Lancaster, the split is roughly even: half the leaning fences we’re called to look at are footing failures from shallow holes in caliche, and half are panel failures from a wind event. Getting the diagnosis right saves you from replacing a perfectly good post – or from patching a panel that’s riding on a post that’s already coming loose.
If you’re at the stage of deciding whether the whole run is worth replacing, our Fence Installation in Lancaster page covers materials, layout, and how we set posts locally.
Why Galvanized Hardware Corrodes Faster in Lancaster’s Alkaline Soil
Lancaster’s soil runs alkaline, and much of the west side sits on caliche – a hard, calcium-rich layer that traps moisture against anything buried in it. Standard electro-galvanized fasteners and brackets don’t hold up. The coating is thin, the alkalinity eats it, and once rust starts at the ground line, the bracket loses grip and the post moves.
What to specify on any repair or new build:
- Hot-dip galvanized or stainless steel for brackets, hinges, and post bases. Skip the thin electro-galvanized hardware that comes loose in a bucket.
- Exterior-rated structural screws with a coated or stainless finish, not drywall screws or interior deck screws.
- Galvanized or stainless post anchors that keep wood off direct soil contact where codes allow.
- Stainless gate hinges with sealed bearings on any metal or heavy wood gate – the gate is where corrosion gets a head start.
We’ve pulled hardware off fences around Quartz Hill and Lancaster that were barely three summers old and already fuzzed with rust at the base. The fix isn’t exotic; it’s just specifying the right metal the first time. If the run is beyond repair, that’s usually the point to price a fresh install rather than another patch.
Wood Fence Warping in the Antelope Valley: Cosmetic or Structural?
Wood moves with moisture, and the Antelope Valley gives it almost none. UV load is brutal, humidity is low, and the swing between a cool night and a hot afternoon stresses every board. The result is cupping, bowing, and pickets that twist out of line within a season or two.
Cosmetic warping – a slightly cupped picket, a small bow in a rail – is normal and worth living with. Structural warping is different:
- Rails pulling loose from posts means the fasteners lost bite and the panel is failing.
- Posts bowing above grade usually means a post set without a proper footing, or the wrong wood species for our climate.
- Pickets twisting and splitting at the nail line means the wood wasn’t kiln-dried or the fasteners were undersized.
For new builds in Lancaster, specify kiln-dried lumber, seal or stain on a schedule, and use screws over nails where the spec allows. Some local installers like cedar for its natural UV resistance; others prefer a sealed pine or composite. Prefab panel systems from brands like Plant Prefab show up in a few Antelope Valley builds, but a traditional stick-built fence with proper footings is still the most reliable in our soil. When the fence is one piece of a bigger yard project, the team behind Driveway & Pavers in Lancaster can coordinate layout so the fence line and the hardscape work off the same plan.
How to Reset a Leaning Post the Right Way (Without Replacing It)
If the post is sound – no rot at the base, no splits along the grain – you can often reset it in place. The wrong way is to kick dirt against it and hope. The right way takes a weekend and a proper cure.
- Dig out the base. Expose the full concrete collar, about 12 to 18 inches down. If the hole was originally shallow, you’re going to correct that now.
- Brace the post plumb. Two braces at 90 degrees, staked to the ground, hold the post in position while concrete sets.
- Widen and deepen the hole. Lancaster’s caliche needs a hole that’s at least three times the post width and deep enough to reach firm soil – typically one-third of the post height above grade, plus a few inches. A 6-foot post wants a hole roughly 24 to 30 inches deep.
- Pour the right mix. A standard 4,000 PSI concrete mix is the baseline. The old “dry concrete” trick some installers use doesn’t set consistently in our soil – mixed and poured is more predictable.
- Crown the concrete. Slope the top of the collar away from the post so water sheds. Standing water against a wood post is the fastest way to rot.
- Cure, don’t load. Leave the braces on for a full 24 to 48 hours. Don’t hang a gate, lean a ladder, or lean on the post. This is the step people skip, and it’s the one that makes a reset last.
If the post is rotted at the base or you’re seeing termites at the ground line, resetting won’t help – it’s a replacement. Local permits through the City of Lancaster typically cover fence repairs over a certain height on property lines, and a permit inspection is one part of a project we’re glad to have on file. That inspector works for you, not for us, and we pull the permit on every eligible job.
Gate Sag Diagnosis: Hinge Failure vs. Post Movement vs. Frame Racking
A sagging gate has three common causes and three different fixes. Misreading it wastes a hinge kit on a post that’s already failing.
- Hinge failure. The gate drags and the gap at the hinge side widens. Look for loose or rusted hinge plates. Fix: replace with stainless, exterior-rated hinges sized for the gate weight.
- Post movement. The post on the hinge side leans when you push the gate closed. The gate sags because the post moved, not the gate. Fix: reset the post with proper concrete, then rehang the gate.
- Frame racking. A wood gate frame out of square – the diagonal measures differently on the two corners. Fix: brace the frame with a proper diagonal or rebuild the gate frame.
A quick test: close the gate and check whether it drags evenly or only at one corner. Even drag usually points to a sagging gate; uneven drag points to a post that moved. On the east side of Lancaster, wind exposure loosens hinge plates faster than on sheltered lots. If the gate is part of a larger addition or property access plan, the team behind Home Additions & ADU in Lancaster can help plan fence and gate placement to keep access clean.
Concrete, Depth, and Cure Time: The Part Everyone Skips
Most post failures we see in Lancaster started with a phone call to a handyman who dug a 12-inch hole, dropped in a post, and set it dry. That works for a mailbox. It doesn’t hold up in our soil.
A proper post setup here:
- Depth: one-third of the post’s above-grade height, plus a few inches. Six-foot posts want roughly 24 to 30 inches of burial.
- Width: three times the post’s width. A 4×4 post wants a 12-inch-diameter hole.
- Mix: a 4,000 PSI concrete mix, mixed and poured. Dry-set is not reliable in caliche.
- Crown: slope the concrete top away from the post to shed water.
- Cure: 24 to 48 hours before you load or hang anything on the post.
Get those five right and you’ve eliminated the biggest single cause of fence failure in Lancaster. Get them wrong and every other repair is a bandage on a wound that keeps reopening.
What to Check Each Season
A ten-minute walk a couple of times a year prevents most of what we’re called out to fix.
- Push every post. A quick firm push at knee height. Any movement means check the footing.
- Look at the ground line. Cracked dirt rings, rot, or termite mud tubes mean trouble.
- Swing every gate. Drag, squeak, or gap change points to hinge or post movement.
- Scan the hardware. Rusty brackets or streaks on rails mean the fasteners are near the end of their life.
- Re-seal or stain wood every couple of years. UV protection is the single biggest thing you can do for a wood fence here.
Common Mistakes to Avoid
- Bracing a leaning post without fixing the footing. Propping the panel back up hides the problem for a season. The post is still moving, and the concrete collar is still broken underneath.
- Using dry-set concrete in caliche. Dry concrete needs soil moisture to set, and there isn’t enough of it at depth. Mixed and poured is the reliable choice in Lancaster.
- Skipping the post anchor. Wood against direct caliche soil is a fast track to rot at the ground line, especially where sprinkler runoff collects.
- Hanging a gate before concrete cures. A gate hung on green concrete cracks the collar or shifts the post within a week. Wait the full 24 to 48 hours.
- Mismatched hardware. Mixing stainless hinges with standard galvanized screws creates a small galvanic reaction that eats the weaker piece. Keep the metal family consistent.
- Ignoring the permit. Fence repairs that change height or line often need a permit through the City of Lancaster. Skipping it can come back on the homeowner at resale.
- Patching a panel on a failing post. A new picket on a post that’s already loose lasts a season. Fix the post first, then the panel.
See the difference
 Before
 After
 Before
 After
 Before
 After
When to Call a Professional
If a post is rotted at the base, a gate post has moved more than an inch, a run of fence is loading a neighbor’s line, or the job touches a permit-eligible change to height or position, that’s a repair worth having done right. Posts under a heavy gate, fence sections on a slope, and anything adjacent to a retaining wall or a property-line survey need a trained eye before anyone digs. Barrett & Sons Construction Lancaster offers free estimates in Lancaster – call (888) 427-1810. Every eligible job gets permits pulled and inspections signed, and every price change arrives as a written change order before work moves.
Frequently Asked Questions
A single post reset typically runs $150 to $350 in Lancaster depending on depth, access, and whether old concrete has to be broken out. Replacing a rotted post and rehanging a panel runs higher. Call (888) 427-1810 for an exact quote – estimates are free.
Roughly one-third of the above-grade height, plus a few inches. A 6-foot post should bury about 24 to 30 inches in a hole three times the post’s width. Caliche is hard digging but shallower holes fail faster here than in most places.
Yes, as long as the post isn’t rotted or split. The post is braced plumb, the hole is widened and deepened, fresh 4,000 PSI concrete is poured and crowned, and the post is left to cure 24 to 48 hours before loading. If the wood is sound, a reset usually outlasts the original install.
Extreme UV and very low humidity dry wood unevenly, so boards cup and twist. Cosmetic cupping is normal. Rails pulling loose from posts or posts bowing is structural and needs a repair.
Simple repairs usually don’t require a permit. Changes to height or position, new fence lines, or anything touching a property line typically do – check with the City of Lancaster before work starts. We pull permits on every eligible job.
Footing failure moves the post at the base; panel failure moves the rails and pickets while the post stays firm. Push test at knee height and check plumb – if the post rocks in the soil, it’s footing. If it stays put and the panel tilts, it’s the panel.
The Bottom Line
Diagnose first, repair second. A post that rocks in the ground is a footing problem – reset it with proper depth, a 4,000 PSI mix, and a full cure. A post that holds firm while the panel tilts is a panel or hardware problem – fix the fasteners and the racking. Match your hardware to Lancaster’s alkaline soil, seal the wood on schedule, and the fence will outlast the install. And when the diagnosis gets murky or the job touches a permit, that’s when to bring in a crew you can call back. Call (888) 427-1810 to schedule your free estimate – our technicians have up to 28 years of experience, and every completed job is backed by our written 90-Day Done Right Promise.
For a full picture of what we handle across the property, start at the Barrett & Sons Construction Lancaster home.
Written by the team at Barrett & Sons Construction Lancaster.